- Published: 22 October 2020
- Hits: 6923
4D Photo Image Documentation Workflow Overview
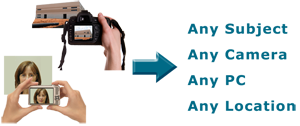
At 4D Imaging Systems, we have defined a simple, step by step approach to photo documenting your Subject. It does not matter if your Subject is a building under construction, a patient in your clinic or hospital, or damage to a vehicle for an insurance appraisal report.
Photo Image Documentation Workflow Steps
With the PhotoStation Manager Software Solution, it is easy to create an indexed, electronically searchable collection of records for each of your Photo Documentation subjects. Each Record managed by the PhotoStation Manager contains a time-series Collection of Photo Images documenting your Subject. You can markup your Photo Images, take Measurements of features you've documented, create a variety of Reports, and Communicate your results to those who need to know.
Capture
 Do you own a digital camera? Photos you capture can now be used as input to a complete Photo Documentation Workflow solution using 4D Imaging Systems PhotoStation Manager software.
Your camera creates digital files in a format called jpeg. Our software takes those files and some information you provide about your Subject, and we do the rest to create a visual Record for each Subject.
If you are thinking about purchasing a camera and need some help figuring out what's best, then download our Digital Camera Primer. Or contact us and we'll help.
Organize

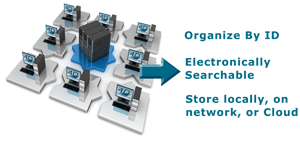
Depending on if you work alone, with others in a single office, or with individuals in a variety of office locations, you can create a single collection of Photo Documentation Records accessible from any location.
Setting up your Photo Documentation Record Collection doesn't require you to have on IT guru on hand to install a complicated database management system. The PhotoStation Manager uses an Open Systems approach to storing and organizing your Photo Documentation that works on any standard PC file system.
Getting started is as easy as picking a top-level Record Collection Folder location on your personal computer, a shared file server on your company network, or a folder in the Cloud. With that, you can begin organizing your Photo Documentation for fast, electronic access from anywhere.
Annotate

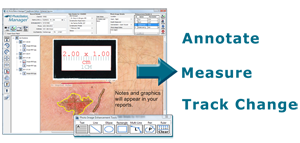
Depending on which PhotoStation Manager Version you choose, you will be able to add additional information to help you better keep track of things. There are two ways we let you annotate your Photo Documentation Record - Keyword Lists and Enhancements.
Keep track of details related to the current step in your Photo Documentation Workflow using Keyword data fields. You can customize Keyword lists to track information about the project or documentation Date on which you captured additional Photo Documentation Images. Track for example who took the pictures or what step in your documentation workflow process you were completing. You can also customize Keyword lists to track information about what is visually documented in each Photo Image.
Enhancements are what we call annotations you can place onto a Photo Image. All Photo Image Enhancements are saved in a separate layer so no changes are ever made to the Photo Image. Each Enhancement can be given a Unique Name and they arelisted in detail at the top with measurements.
Report
 Creating a visual Report detailing what you have seen and have documented is as easy as the click of your mouse. All Reports are created are themselves jpeg files and automatically organized in your Subject Photo Documentation Record History, sorted relative to the Photo Images that were used to create the Report.
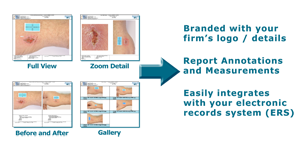
All Reports will include a header that is customized with your firm's Logo and Contact Details. Identifying information about the Subject is also included at the top.
Depending on your particular need, you may want to email a few Photo Images with information about what you saw or perhaps measured. You can use a Full View Report. There may be a Photo Image that has a particular detail you want to make sure is highlighted. You can use a Zoom Detail Report for that. Perhaps you want to visually show a progression of change over time. You have a 2 or 3 shot Before and After Report for that. Or perhaps you want to show a series of Photo Images documenting changes in your Subject over the course of a day. Use the Gallery Report for that.
One last special Report is what we call the Enhancement Change Report. If you have a detail you've documented and measured at two different times, you can create a Before and After that shows a zoomed-in view of the detail, the measurements at each time, and an automatically calculated change in the size of the detail.
Communicate
 Once you've completed your Photo Documentation Workflow for the day, you may need to share the results with your peers or management. With the PhotoStation Manager, getting to your Photo Documentation results where they need to go is simple and fast. The PhotoStation Manager is Open Systems based and that means you can use all your existing tools, including your Email, Office Productivity, and Image Editing Tools, and more.

